Advertisement

Showing posts with label Arduino. Show all posts

Sunday, January 5, 2014

Arduino is Broken

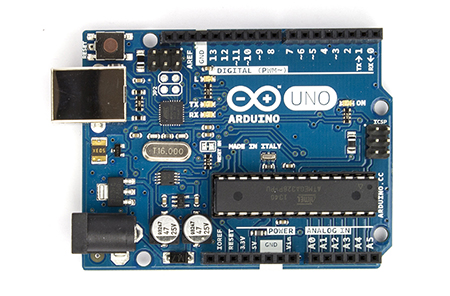
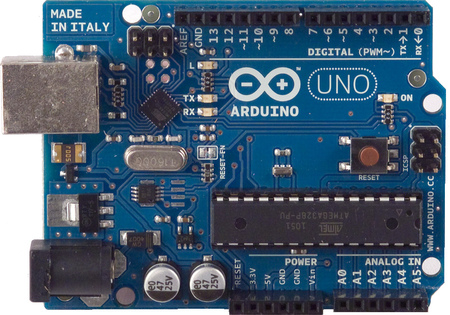
I'm pretty sure my Arduino Uno is broken.  When I plug it in using the USB cable, the green power light turns on and the L light near pin 13 turns yellow.  They are the only lights that come on.  They do not blink.  They do not turn off.

Also, the Arduino IDE software on my Ubuntu 12.04 does not see the Arduino when I plug in the USB cable.  When I click on Tools from the IDE menu, the Serial Port entry is greyed out.  The same thing is true when I connect the Arduino to my Windows computer.  The IDE software in Windows has the Serial Port entry greyed out as well.

I tried resetting the Arduino by pressing the reset button.  Nothing happens.  I also hold down the reset button while plugging in power.  Again, nothing happens.

I did some research on the internet.  I think the problem is that either

  1. the AT chip is bad or
  2. the bootloader software on the chip got erased or corrupted and needs to be reloaded.
I found a page that talks about how to update the firmware on the Arduino.  Not sure if this will work but I'll have to give it a shot.


Saturday, January 4, 2014

12v Power with Arduino Test

Tonight I tried to get my Arduino to work stand-alone with a 12v, 2A external power supply.  I hooked the Arduino up to my servo motor, then plugged it in to power.  It worked as I expected it to.  The Arduino made the motor spin one direction for 1 second, then the other direction for 2 seconds.  It stopped after one minute.

Next, I wanted to connect the servo to a fixture I had 3D printed for the automated dog food dispenser.  It
took me several minutes to get the servo connected to the fixture.  The Arduino was plugged in to the 12v power the whole time.  When I was ready to test the program again, I smelled a slight electrical burning.  I sniffed the servo and the Arduino but neither had a strong burning smell.  The main chip on the Arduino was a bit hot so I unplugged it from the power.

Then, I connected the servo to the Arduino and plugged in the 12v power supply.  The servo did not turn at all and one of the lights on the Arduino that normally turns on did not.

I plugged in the 9v power supply to the Arduino and the servo spun but only in one direction.  Also, it never stopped spinning.  I pulled the wire from the signal pin on the servo and it still kept spinning.  Pushing the reset button on the Arduino also does nothing.

Something is wrong, but I am not sure exactly what.  Maybe I burned out the Arduino chip.  Maybe I just wiped out the sketch from the Arduino.  I have to do more experimenting some other day.

BTW, according to this official Arduino page, the power input range is recommended to be from 7-12v but will handle from 6-20v.  So, my 12v power supply should not have burned it out.


Friday, January 3, 2014

Controlling a Servo with an Arduino

Tonight at the Milwaukee Makerspace, I worked on getting my Arduino Uno to control a servo motor.  I need the servo to control the auger on my automated dog food dispenser.

I got the sketch working to control the servo over Thanksgiving weekend.  However, it only worked when the Arduino was connected to the computer over a USB cable.  When I powered it with a USB cable from a wall wart, the servo did not spin correctly.

Tonight, I did some more testing.  First, I changed the code slightly so the servo runs for one minute and shuts off.  It worked great when connected to a computer.

Next, I connect a 9v power supply to the Arduino.  It powered up but the servo never spun.  One website said that this is because the Arduino is getting interference on the RX port.  The fix is to connect the RX port to ground via a 10k resistor.  I tried that by connecting the digital RX port to ground with a resistor but it made no difference.

I used a multimeter to see how many volts the Arduino was putting out when powered by the computer and when powered by the external power supply.  On the computer, the 5v port output 5 volts.  On the external power supply, the 5v port output 4.85 volts.  I can't believe that makes a difference.

Next, I tried powering the servo from the 3.3v port instead of the 5v port when powered by the computer.  The servo still worked but would only spin in one direction.

I think I will try a 12 volt power supply next to see if that helps.


Friday, November 29, 2013

Fun With a New Arduino

I was visiting my Mom and sister and nephew over the Thanksgiving holiday.  My nephew is, like me, interested in electronics and microcontrollers.  We spent a lot of time just goofing around with different projects.  It was a great couple of days.

There is a neat store near his house called Gateway Electronics.  They have pretty much everything you could want for electronic projects for good prices (and free Twizzlers).  I bought an Arduino Uno, a continuous operation servo, and a couple of potentiometers.  My nephew bought the DFRobot Arduino LCD keypad shield for his Arduino.  We spent the rest of the day trying to get the Arduinos working with LCD displays and the servo.

Adafruit has a web page that explains how to connect an Arduino to an LCD.  The LCD in the example was a 16x2 LCD.  I had an LCD display from the Milwaukee Makerspace.  It looks like most LCDs are the same.  They have 14 or 16 pins.  Pin one is ground.  Pin two is power in.  Pin three is to control contrast.  Pins 15 and 16 control the backlight, if the LCD has that feature.  Pins 4 through 14 are to send data to the LCD.  Check out the Adafruit web page for more details.

The Arduino IDE comes with several example programs for displaying on an LCD.  Plus, there is a built-in library called LiquidCrystal that makes it very easy to work with LCDs.  The Adafruit page does a good job explaining the basics for first-time users like me.

Our first try at connecting the Arduino to the LCD was a bit flaky.  The display would go a bit crazy after the first boot-up.  If we wiggled the cables, the display would change.  We replaced all of the cables with different ones and the LCD worked perfectly.

Various web pages say that a potentiometer is needed to control the contrast.  You can see it in the picture above next to the right-hand corner of the LCD.  It basically needs power and ground on the outside pins.  The middle pin connects to the contrast pin on the LCD.

My nephew hooked his DFRobot LCD shield to his Arduino.  Their web page has some sample code.  He downloaded the code to the Arduino and the board worked great -- at first.  After about 30 seconds, the display started getting flaky.  Tapping on the screen would settle it momentarily.  Everything works functionally, but the display is not stable.  Looks like he will have to exchange it for a better one.

Next, I hooked the servo to the Arduino.  I found an Arduino sketch to control the servo with pulse width modulation.  It basically lets you press keys on the computer keyboard to speed up and slow down the servo.  I played around with the minimum and maximum settings and was able to get the servo to go both clockwise and counter clockwise.  I also added the LCD code to the sketch to display the pulse width setting on the screen.  Nice!

The Arduino IDE comes with a library for the servo called the Servo Library.  I did not play with the Library much but I was able to get it to go clockwise, counterclockwise, and stop.  The library did not control the time, nor the speed.  Maybe it will, but I could not get it to work that way.

In the picture to the right, you can see the Arduino in the front, the LCD in the middle, and the servo in the rear.  I would like to use the Servo to control the automated pet food dispenser.  In theory, I could connect the Arduino to the servo and plug the power for the Arduino to a timer that will turn it on once or twice a day for five minutes.  The program I wrote moves the augur counter-clockwise for about 1 second.  Then, it rotates clockwise for 2 seconds.  According to the Instructable about the dispenser, this will keep the augur from jamming on food pieces.  One weird thing is that the program works great when the Arduino is connected to the PC but not when it is connected to a USB power converter.

Here is the code to control the servo.

#include <server.h>

Servo augur; 

void setup() 


void loop()

  // Make the servo turn clockwise then counter 
  // Set up the servo 
  augur.attach(9); 

  // Spin counter clockwise 
  augur.write(-180); 
  delay(1000); 

  // Spin clockwise 
  augur.write(180); 
  delay(2000); 

  augur.detach(); 
  delay(500); 
}