Advertisement

Showing posts with label Makerspace. Show all posts

Friday, December 18, 2015

Simple Basement Storage Platform

I was at the Milwaukee Makerspace for the last time this year and possibly for the next few months.  Tonight, I spent my time making some simple basement storage platforms in the woodshop.  Altogether, I made four platforms.  The materials needed was:

  • Two (2) eight foot long 2x6 boards
  • Two (2) two foot by four foot, 1/8 inch thick sheets of hardboard
  • A handful of nails
The Makerspace has several great woodcutting tools that made the job go very quickly.  In about an hour, I had four pretty nice looking platforms.  The plan is to give them to a friend of ours from our weekly Bible Study group.


Merry Christmas!

Friday, November 21, 2014

Electric Razor Fixed

We have a Remington Precision electric razor that my wife uses to cut the kid's hair.  The other day it started acting up.  Wiggling the wire would make it turn on or off.  Obviously, there was a break in the wire.

I was at the Milwaukee Makerspace tonight and brought the razor to repair.  It took me about an hour to do the work but I think I fixed it.

There is only one screw holding the case together.  After removing the screw, the case comes apart with a bit of coaxing.

One of the wires on the power cable connects directly to the power switch.  The other wire is connected to a wire from the razor via a crimp connector.  The first step was to de-solder the wire from the power switch.  I could not find any de-soldering wick so I just applied some heat and forced the wire off.

Rather than cut the wires going into the connector and shortening the one from the razor, I used a vise to expand the connector and remove the wires.  That was surprisingly easy.

After disconnecting the power cable from the razor, I cut the wire just below where I thought the break in the cable was.  Next, I stripped about one inch off of the end of each cable.  The existing cable was tied in a knot that looked like a pretzel.  I tied the end of the remaining cable into a similar knot.

The final steps were to reconnect the individual wires to the switch and the razor.  I soldered one wire to the switch.  The other wire was connected to the wire from the razor.  I was able to use the original connector and re-crimp it.

I tested the razor and it appears to work!  Looks like I saved $30 by fixing it myself at the Makerspace.

Friday, January 17, 2014

Learning CAD and Trying to 3D Print

I made it back up to the Milwaukee Makerspace after two weeks.  I worked on projects at home last week.  Today, I wanted to do some 3D printing.  I started off trying to print a base for a raspberry pi.  The work kept getting messed up before the raft was finished.  I think the print bed needs to be resurfaced.

I gave up after an hour and started printing chess pieces for the wobbly chess set instead.  The print run will probably take over six hours to complete. Unfortunately, I could not stay at the space until 2am, so I left the machine printing.  I hope if completes.

While the printer was running, I decided to try making a very simple CAD drawing.  At the Makerspace, we have tool holders that are not ideal for the smaller screwdrivers we have in the electronics lab.  I thought I would make a simple rectangle piece that was solid except for holes for the screwdrivers.

I created the drawing in LibreCad and saved it as a DXF file.  Next, I tried to figure out how to convert a DXF file to STL.  Google Sketchup will supposedly do the conversion but only if you have the Pro version.

I read that Blender will do it so I installed that on my Linux laptop.  However, Blender would not open my DXF file.

That's pretty much as far as I got tonight.  Not very exciting but being a Maker takes a lot of patience and persistence.

Sunday, November 24, 2013

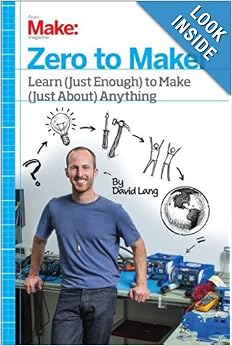
Review of Make: Zero to Maker book

I recently read a book named Zero to Maker: Learn (Just Enough) to make (Just About) Anything by David Lang.  Here is my review.

Zero to Maker is about one man's journey to go from knowing next to nothing about making stuff to becoming a full-fledged Maker.  Along the way, he explains all aspects of the burgeoning Maker movement, from how to get involved in making (I recommend joining the Milwaukee Makerspace if you live in the area) to "going pro" with your own business.  Lang explains the software and tools commonly used by Makers -- Instructables, Meetup, Sketchup, 3D printers, welding, etc.  The book is full of real-life stories of Makers, inventors, and entrepreneurs and has dozens of links to web pages of Makers, tools (both hardware and software), and how-tos.  The final chapters of the book cover topics for entrepreneurs like building a team, raising money, and protecting your idea.

Lang got into the Maker movement after being let go from his Marketing job at a start-up company.  Rather than find another job in his field, he decided to parlay his writing skills into a 30 day adventure into making.  Lang partnered with Eric Stackpole to develop a DIY, open source, underwater vehicle (openrov.com).  Working on the open ROV project forced Lang to learn many new skills including electronics, robotics, microcontrollers, CNC machining, among others.

Lang also wrote a blog about his experiences for Make:  To get material for the blog, and eventually for the book, Lang interviewed people in the Maker movement, visited hackerspaces and tool lending libraries, and joined the TechShop in San Francisco.  His varied experiences make for interesting reading.

I recommend this book to people who want to learn more about the maker movement, and new makers.  Experienced makers will also find the stories interesting but may not learn a lot of new things about the tools used.

I also made an outline for the book on Google Docs.  Feel free to check it out and make comments to enhance it.

Saturday, August 17, 2013

Tardis Printed & Painted / First Laser Cutting

Its only about two weeks until Dima's birthday and I need to get the Tardis finished.  I spent a few hours at the MakerSpace this afternoon working on that.  I managed to print the final two sides of the Tardis with no problems.  Next, I spray painted all of the parts navy blue.  I'll give them a day to dry and then assemble them.  I might have to punt on the electrical for now just to get it done in time for his birthday.


While I was here I got someone to help me laser cut some pieces for Anna's rabbit hutch.  It came out okay.  I had to print the shapes four times to get the laser to cut all the way through.  Even then, I had to pop out the pieces.  The sides needed sanding because there were some share edges and the edges are not exactly square.  I guess I need some practice but these pieces will do fine for now.  I need to cut two or three more pieces to cover all four sides if the cage.


Another great day at the Makerspace.

Sunday, July 28, 2013

My first 3D printing experience

The Milwaukee Makerspace has several 3D printers.  One of them is a Makerbot Replicator.  I was able to use the printer tonight to start a project that I saw on Thingiverse.

I am going to make a Tardis from Dr. Who for my son Dmitry's birthday (shhh. Don't tell him).  Here is a link to the project on Thingiverse.  The extruder material we have at the 'space is white so I will need to paint it blue.  I also might install the lights if I am ambitious.

The process was very easy.

First, I had to download the Makerware software from the Makerbot website.  I have a portable running Ubuntu so I had to download the version for Ubuntu 12.0.4 LTS.  By the way, to figure out what version of Ubuntu you have, type "lsb_release -a" at the command prompt.  the Makerbot website has excellent step-by-step instructions and the install process was very easy.

Next, I downloaded the 3D printable images from Thingiverse.  The files came down as a zip file.  I unzipped it to the folder.  Again, very easy.

The next step was to open one of the stl files in Makerware.  I tweaked a few of the settings for the Replicator and based on recommendations from the Thingi author.  Makerware saved the "g-code" files to an SD card.

The SD card was inserted in the Makerbot's SD card slot.  I kicked off the print and sat back to wait.

The first piece I printed was one of the side panels.  It took almost an hour to print.  It looks like it stopped early.  Not sure what happened.  Maybe the extruder jammed.  (Update.  The side panel did not printer correctly.  The picture shows the back of the door.  The front did not finish printing.)

I also printed two other pieces.  They appeared to print correctly.

That was enough for one night.  I will do some more printing another day.

Another great time at the Makerspace.  Thanks to Joe B. for his help.

My first Instructable

A week or so ago, the Makerspace got some free samples of a playdoh like substance called Sugru.  In exchange for the free stuff, we were asked to make some cool things and post them on Instructables.

I used a small amount to fill a hole that was drilled too large in my rocket launcher.  Tonight, I created the instructable for using the Sugru.  I suppose filling a hole is not very exciting but since is this is my first instructable, I figured I would blog about it.

Here is the link to the instructable: http://www.instructables.com/id/Fix-a-hole-that-is-too-big-with-Sugru/.  You can see a picture of the plugged hole if you follow the link.

Saturday, July 27, 2013

Soldering lessons

This afternoon I did a quick soldering lesson with Katie and Jacob at the Makerspace. The 'space has a learn to solder kit. Both Katie and Jacob tried their hand at the soldering iron. The end result is the Makerspace logo guy with blinking eyes. Nice work guys.

Tuesday, July 16, 2013

Welding and sugru

Here are pictures of what I did tonight at the Milwaukee Makerspace. First, Matt W. and Dan helped me weld a jack onto my trailer hitch. It is a super strong weld that should outlast the rest of the trailer. They did most of the work but I did get to do some welding. I am looking forward to doing more.

They also had a sugru build night at the space. I tried fixing Tim's broken headphones. I did not hold the pieces together long enough for the sugru to harden so it did not stay. I need to figure out a way to hold it together while the sugru hardens.

I did use the sugru to fill the hole in my rocket launcher where the LED goes. Once that hardens it should be good.

It was another good night at the Makerspace.

Friday, June 21, 2013

More python coding

Went to the Makerspace last night and worked on the python code for the Home Environmental Sensor Array on the raspberry pi. Spent some trial and error time getting the email module to work. Added some features so it will include a cc and bcc in the address list. Still need to test a bit more but it works to send emails with several lines in the body of the message.

Also, my wife, mother-in-law and daughter showed up for the Etsy craft party and a tour of the space. They each made a craft that was donated to the animal shelter.

Saturday, June 15, 2013

Rocket launcher with Tim and Jacob

Tim, Jacob and I went to the Makerspace today. Jacob made a cool ninja racer out of Legos. Tim and I made a rocket launcher.  The LED on the launcher does not work but other than that it should work to launch a rocket. We'll test it tomorrow.

Tim and I also put a power cord on one of the water pumps I picked up to test my water sensor.

Finally, I got trained on one of the drill press machines at the Makerspace.  Now I can use it.


Thursday, June 6, 2013

Started assembling the Power Switch Tail

I started soldering parts onto the Power Switch Tail at the Milwaukee Makerspace tonight. I got all but two pieces soldered on in about two hours. Pretty slow. It took me awhile to figure out what resistors to use. Then, I messed up on one of the resistors and spent way too much time fixing it. On the bright side, a guy named Bob sat across from me and gave me a lot of help. He is an expert solderer and quickly gave me a beginner lesson. What a huge help. (Thanks God for sending Bob to help me.) I took a few pictures of my workspace and progress.


In other news, I did not get the Makership which would have given me a free three month membership to the Makerspace. So, I signed up for a part time membership. Anyone reading this (who I already know) who would like a tour, just let me know. I'm going to try to hang out there every Thursday night and one Saturday a month. We'll see how it goes.

Tuesday, May 21, 2013

Maker meeting

I went to another Milwaukee Maker meeting tonight. It was better than last time. One reason was because my friend Dave met me there. Also, the people seemed to be a bit more open. Maybe I was in a better mood. Maybe there were more people there so everyone was more friendly. Who knows? Overall, it was a good time.

I got some ideas for my water sensor and am excited to try them out. I am also hoping to make a case for my rocket launcher. Maybe I can get help with both projects.

Finally, the welding guy said he would help me fix the broken rung on my scaffold. If I am a member he will let me do it myself. Very cool!

I think I will apply for the free summer membership. Maybe that will be my sign about whether I should do this or not. If I get the free membership it is meant to be. Otherwise, maybe not.

Friday, May 17, 2013

2nd Milwaukee Makers Meeting

I attended my 2nd meeting at the Milwaukee Makerspace at 2555 S. Lenox St. in Milwaukee.  I wanted to get some direction / advice to build a simple rocket launcher.

On the one hand, it was a bit disappointing.  There were only a couple of people there working on electronics projects.  The guy working on the raspberry pi project did not show up at all.  So, I did not get any help or advice for my rocket launcher.  I spent about three hours trying to duplicate the circuit on my breadboard but since I have no idea what I am doing, I made little headway.

On the other hand, there were some interesting people there and I did enjoy the conversations.  I showed one guy my raspberry pi and we talked about possible ways to use it.

I will go back on Tuesday and a few more times.  Maybe there will be different people there and one of them will be willing to give me some basic advice.  In the meantime, I found a basic electronics course on instructables that I will take.  I also need to get more electronics supplies like male to female jumper cables so I can plan around more with basic circuits.  Finally, I need to figure out how to make basic circuit boards.

Anyone with electronics knowledge looking for a challenge?  I need a mentor...