Advertisement

Showing posts with label BeagleBone Black. Show all posts

Friday, November 20, 2015

Injection Molding Machine Simulator

For the last month or so, I have been spending my weekly Makerspace time working on simulating an injection molding machine on a microprocessor.  This is a project for work.  I want to setup a test environment to work with Mattec, our MES software used to control injection molding machines in our plastic parts plants.  To make a proper test system, I would like to send signals from a simulated injection molding machine into the system.

Beaglebone Black Fail
I first started working with a Beaglebone Black.  I was able to write a simple python program to turn LEDs on an off at random times.  However, that program only worked once.  After the first time, I could not get it to work.  Not sure what went wrong.  I may have fried the BBB somehow.  It still boots, I can connect to it.  I can execute BoneScript code.  I just can't get any python code to work.

At some point, (may have been before I tried the python code but also certainly after) I tried to upgrade the OS on the BBB to the latest version of Debian dates 2015-03-01.  I followed the same instructions from the last time I did this.  I did not get any errors creating the SD card.  When I bootup the BBB in install mode, the lights start flashing.  All three LEDs are supposed to light solid when the install is done.  However, this never happens.  I've tried several times with no success.

Raspberry Pi and Basic Simulation Definition
So, I moved on to the Raspberry Pi.  I wrote a program to randomly turn LEDs on an off.  If I ever actually get to use this on my test system, rather then turning on the LEDs, the Pi will send an electrical signal to an interface unit.  There will be a signal to say that the fill process is complete, one to say a cycle is complete, and one to indicate that the last piece produced was scrap.

Classes
A part of functionfunctionfunctionthe process, I learned how to use a Class to store data.  I wish I would have learned about this earlier.  I love using arrays in other languages.  There is nothing really like an array in Python.  However, a class is even better than an array.  I made a class that represents a molding machine with sub-classes for the sensors on the machine.  If I want to access the cycle time for the machine, I simply access the data at IMM10.Cycle.AvgTime.  Very cool!

Down Event Probability Using a Poisson Distribution
The machine class has a function that will calculate the probability that a machine will go down during a given cycle.  It uses the poisson distribution function to determine this.  Just input the average number of cycles per month and the average number of down events that machine per month.  The poisson distribution function uses these numbers to determine the probability.  Excellent!

General Python Program Functionality
Multiple machines can be defined with different fill rates, cycle times, scrap probabilities, and down probabilities.  The program continuously simulates cycles for each machine.  It will send a signal when the fill part ends, then another signal when the complete cycle ends.  Next, it decides if the machine functionfunctionproduced scrap during that cycle.  If so, it sends that signal.  Finally, it determines if the machine when down at the end of the cycle.  If so, it sets a timer and waits for the down event to end before resetting the fill and cycle timers.

Determining Times Randomly Using a Normal Distribution and scipy
The time for the fill and cycle are randomly determined based on the average times for that machine. The probability calculation is not a simply random number generator.  It gets a random time that is within one standard deviation of the average, assuming that the probability has a normal distribution.  This is better than a purely random number between the minimum and maximum range.  The probability could be outside of that range but should be normally close to the average.  In a future release, I'd like to add in some kind of randomality to generate outliers.

In order to generate this kind of random number, I had to install a Python library called scipy (www.scipy.org). That library has a function called "percent point function" that will compute the inverse of the cumulative distribution function of a standard normal distribution.

I'm not exactly how the function works, but if I send it a random number between 0 and 1, and tell it to use a mean of 40 and 3 standard deviations, its sends back numbers that appear to be distributed around 40.

Here is one helpful link that explains more about using scipy in this way:

scipy can be installed on the Raspberry Pi simply by typing  
sudo apt-get install python-scipy
Future Enhancements
For now, when a machine goes down, the duration of the down event is a purely random number between 5 seconds and 4 hours.  In reality, most down time events last less than five minutes, but some can last for days or weeks.  I'd like to have a formula that will mostly pick down event durations that are short but could pick longer ones.  I can't figure that out just yet.

Another future enhancement would be read in machine and sensor definitions from a text file or some other source.  It would be cool if the source data could be managed with a web page.  Then, I could control the parameters of the device remotely.

Also, the Raspberry Pi outputs about 3 volts.  If I need to generate more volts or a higher current, I might have to make a circuit board with transistors.

This brings us up to date.  I'll add more about generating random downtime durations later.

Monday, June 23, 2014

Measuring Light with a Beaglebone Black

I spent Friday evening at the Milwaukee Makerspace experimenting with a photoresistor on my Beaglebone Black.  I am still trying to learn more about how the BBB works and am going through some learning tutorials on the Adafruit website.  They have one titled Measuring Light with a BeagleBone Black that I was using.

Before I could do anything, I had to enable ADC in the slots file.  The slots file is in the /sys/devices/bone.capemgr.9 folder.  I did not have the correct rights to modify the file.  This was fixed by typing 
sudo chmod 666 slots
to give all users rights to modify the file.

Next, I enabled ADC on the BBB by typing 
echo BB-ADC > slots
while in the folder where the slots file is stored.  I did not have to reboot the BBB.  The change took affect immediately.

I spent a couple of hours playing around with the circuit.  It is extremely simply since it only has a resistor and the photoresistor.  The circuit is a voltage divider.  Basically, the BBB puts a constant 1.8 volts into the circuit.  The resistor keeps some of the voltage from going to ground.  The pin that accepts the incoming voltage on the BBB measures different voltages depending on how much light is coming in to the photoresistor.  The more light that comes in, the more voltage goes to the BBB in pin and not to ground.

I'm not really sure why it works that way but it does.

So, my first experiment with analog readings on the BBB worked.  Next, I would like to figure out how to measure DC volts on the BBB.  That will be a bit tricky because the analog input pins will not take more than 1.8 volts.

Friday, June 13, 2014

Played Around With My Beaglebone Black

I was at the Milwaukee Makerspace for my weekly hobby time.  Tonight, I mainly spent time working on my Beaglebone Black.

It looks like the version of Debian Linux that I previously installed on the BBB already had Avahi installed and working.  The host name is beaglebone.local.  I was able to ssh to the BBB over the local network with no problem.

There are users named debian, kbecker, and hesa on the BBB.

Next, I used the dpkg-reconfigure tzdata program to set the time zone to central time .  It brought up a menu where I could select my time zone.

Next, I ran sudo apt-get update just to make sure everything is up-to-date.  

Finally, I added the hesa user to the sudoers file so it could have sudo access.

Now, the basic stuff is done and the BBB is ready to go.

The next step is to get python on the BBB and do some programming.

Adafruit has a python library for the BBB.  I'm not sure if there are others but I installed Adafruit's python library.  The command to install the library is:
sudo apt-get install build-essential python-dev python-setuptools python-pip python-smbus -y
The Adafruit page has some sample code that I played around with.  I was able to light an LED.  The next step is to get the HESA code working on the BBB.
I also started a 3D print of a base for the BBB.  It won't be done before I leave but hopefully, it will finish.

Sunday, March 16, 2014

Flashed Debian Linux onto Beaglebone Black

I continued working on upgrading the Linux distribution on my Beaglebone Black this weekend.  I flashed a version of Angrstrom to the eMMC.  Then, I flashed Debian Linux to the eMMC.  Finally, I did some minor setup work on Debian.

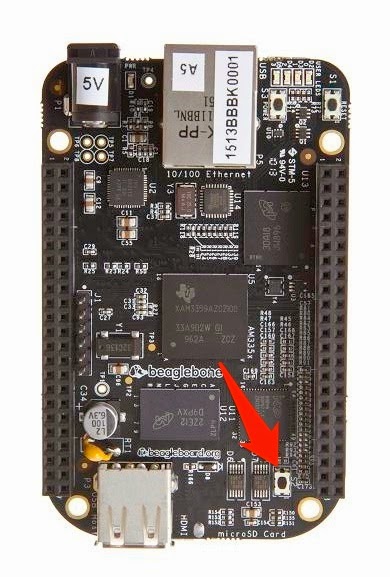
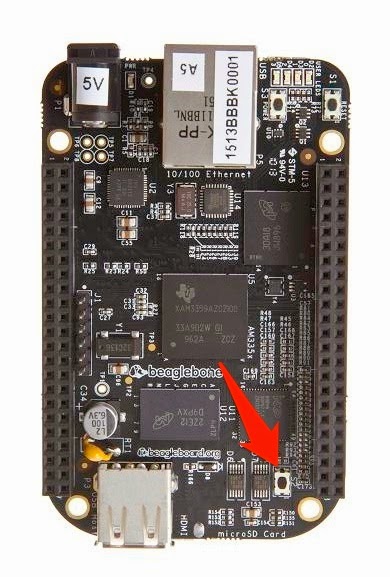
First, I tried flashing the Angstrom distribution onto the eMMC of the BBB.  To do this, I inserted a with the Angstrom image on it into the SD slot on the BBB.  Then, I held down the boot button on the BBB while I plugged in to the USB cable from my Ubuntu PC.  The BBB started installing the new image into the eMMC.  After about an hour, all four LEDs on the BBB lit up signaling that the install was complete.  I unplugged the USB cord from the BBB, removed the SD card, and reconnected the USB cable.  The BBB powered up and the Ubuntu PC recognized it as an external hard drive.
microSD card

Next, I connected to the BBB by typing
sudo ssh 192.168.7.2
at a terminal prompt.  I typed
lsb_release -a
at the BBB terminal prompt.  It reported that I was running AngstroGNU/Linux v2012.12.  I wanted to install a version of Angstrom from 2013.  To make a long story short, the image of Angstrom on the SD card was the 2012.12 version.  So, the flash process probably worked all along but was not flashing the version I thought.  Doh!

Now that I figure out what was happening, I decided to install a version of Debian Linux.  There are two ways to run Debian on the BBB.  One way is to install a bootable version of Debian on the microSD card.  Then, if you power on the BBB while holding down the boot button, it will load the OS on the SD card rather than the OS on the eMMC.  This might be safer than flashing the eMMC but it would mean that I could not reboot the BBB remotely or count on it coming up correctly if it lost power.

The second option for installing Debian on the BBB is to flash the eMMC with an image of Debian Linux.  This is the option I chose and this is what I will describe below.

Searching the internet for help simply made me confused.  There are a few websites that talk about doing this but the information is written for Linux experts (which I am not).  Here are the steps I followed to get Debian Linux installed on my BeagleBone Black.

(I did this entire process on my Linux laptop.  You could also do this on a Windows PC but some steps are different.  I will also mention how to do this on a Windows PC, if applicable.)

Step 1: Download the latest image.
The latest Debian and Angstrom images can be found at http://beagleboard.org/latest-images.  I clicked on the link named Debian (BeagleBone Black - 2GB eMMC.  This is the image file that will flash the eMMC.  The file was downloaded to my downloads folder in my home drive.

Step 2: Unpack the image.
The downloaded file is in a compressed format that is not usable as it is.  The file must be uncompressed.  In Linux, this is done with the unxz command.  In Windows, you would need a program like 7zip to uncompress the image.  Since I am using Linux, I typed
unxz BBB-eMMC-flasher-debian-7.4-2014-03-04-2gb.img.xz 
at the terminal prompt.  The unxz program creates an image file in the same location that the xz was in and deletes the xz file.

Step 3: Copy the image to the SD card
The next step is to put the image onto a miniSD card.  Insert the miniSD card into your PCs SD slot.  Linux has a command called dd to write an image to a disk.  In Windows, use a program called Win32 Disk Imager to do the same thing.  Again, since I am using Linux, I typed
sudo dd if=./BBB-eMMC-flasher-debian-7.4-2014-03-04-2gb.img of=/dev/mmcblk0
to write the image to the SD card.  It took awhile to write the image to the SD card.  I do not know exactly how much time but it was more than fifteen minutes.

dd is the program that writes the image.  On my computer, mmcblk0 is the name of the SD card device.  The device name may be different on your computer.  Type lsblk at a terminal prompt in Ubuntu to see a list of your devices.

Step 4: Flash the eMMC on the BBB.
This is probably the easiest part of the whole process.  Make sure the power is off on the BeagleBone microSD card out of the PC and insert it into the microSD slot on the BBB.  Then, hold down the boot button on the BBB while applying power.  I held the button down until all of the LEDs were on solid.  Then, I stopped pressing the button.  The BBB started flashing Debian onto the eMMC.  After about ten minutes, all four LEDs came on solid and stayed on.  That is the signal that the process is complete.  I unplugged power from the BBB and removed the SD card.

Step 5: Verify that the flash worked.
I connected the BBB to my Linux PC with the USB cable.  This provides power to the BBB and it booted up.  The Linux PC saw the BBB as a connected storage device.  I connected to the BBB with ssh by typing
sudo ssh 192.168.7.2
at a terminal prompt.  I typed
lsb_release -a
at the BBB terminal prompt.  It reported that I was running Debian GNU/Linux 7.4 (Wheezy).  Perfecto!

Update Linux
As a final step, I update Linux on the Beaglebone Black.  I connected the BBB to an Ethernet cable to get it on the internet.  Then, I plugged in a 5V power supply.  When it booted, I used ssh to connect to it over my home network.  I ran the following two commands to make sure it had all the latest updates.
sudo apt-get upgrade

sudo apt-get update

Next time, I will setup a user account for myself and install Avahi.

Friday, March 14, 2014

Updated Angstrom Distro on BeagleBone Black

I worked on my BeagleBone Black at the Milwaukee Makerspace tonight.  My goal was to update the Angstrom distribution to the 2013-09-04 version.  The first thing I did was plug the BBB into my Linux laptop via the USB cable.  I tried connecting to it through the browser but Chrome did not see it at the default IP address.   Hmmm......

Looking at the board a bit closer, I noticed that the LED signifying activity on the SD card was flashing as well as the CPU activity LED, and the eMMC LED.  Hmmm.....

The SD card had the Angstrom distribution on it.  It looked like the BBB was updating the distribution files on the eMMC.  I thought that I had to hold down the Boot button while applying power to start the update process but I had not done that.  I decided to wait 45 minutes or so and see what happened.

About an hour later, all four LEDs were lit up.  That means that the upgrade process completed successfully.  I unplugged the power, removed the SD card, and replugged the BBB to the USB cable.  This time, when it powered up, the Linux saw the BBB as an external drive.  I was able to use ssh to login to the BBB.

I need to figure out how to know what version of the Angstrom distribution is on the BBB.

Next step is to download the Ubuntu image to boot off of the SD card.


Saturday, January 4, 2014

Updating the O/S on the BeagleBone Black

A few days ago, I worked on my BeagleBone Black (BBB) but I did not make a post until now.

I bought a 16gb micro-SD card on the way home from work.  Now, I can update the Angstrom distribution on the BBB.  First, I downloaded the "Angstrom Distribution for BeagleBone Black - 2GB eMMC" dated 2013-09-04.

Next, I downloaded and installed 7-Zip.  I got the 64-bit version for Windows.  I used 7-Zip to unzip the img file.  The Win32DiskImager tool was used to put the image on the 16gb micro-SD card.  I had to use the SD adapter that the micro-SD card came with.  At first, I tried an older SD adapter and the computer kept saying that the card was read-only.  That was strange.

(My AV software said that a trojan horse program was also in the 7-zip install package.  It deleted the virus and 7-zip worked just fine.  More weirdness.)

After putting the image on the micro-SD card, I inserted it into the BBB, and applied power from an external 5v power supply while holding down the boot button.  The activity lights started blinking like they normally do.  I was not sure if it was working or not so I left it alone for about an hour.  I expected to come back and see all four activity lights on steady.  They were all still flashing away.  

So, either
a) the flash did not work
b) the flash was still going after an hour
c) the flash worked but the four lights did not stay on steady.

When I have some time, I will check the micro-SD card on a PC to see what version of the distribution is on it.

Maybe I need to format the micro-SD card first, then copy the distribution to it, then flash the BBB.  This is a lower priority project for me right now so I might not get to it until after I get a few other things done.

Wednesday, January 1, 2014

Learning about the BeagleBone Black (BBB)

I spent part of my day off learning about the BeagleBone Black (BBB).  I want to replace the Raspberry Pi (RPi) in my Home Environmental Sensor Array with a BBB.  The BBB is a Linux computer just like the RPi but the BBB has both digital and analog inputs and more of them.

Here is some general information I learned.  The BBB is using the sh shell.  The RPi uses the bash shell.  The BBB comes with a version of Angstrom Linux on the internal eMMC card.

I needed a way to power the BBB without the USB connected to a PC.  I had an old Linksys phone device that has a power supply that converts 120v to 5v, 2A.  It will power the BBB.  

Previously, I created an account on the BBB for kbecker with my standard password.  I plugged the BBB in to an ethernet cable and could ssh into it from my Linux laptop.  I tried using FileZilla to connect to the BBB but it would not login.  FTP is probably not enabled for anonymous access or something.

I don't really want to make any changes to the BBB until I upgrade the O/S and put Ubuntu Linux on a bootable mini-SD card.  I don't have a mini-SD card right now.  That is the next thing to do.


Friday, August 9, 2013

A Bit More 3D Printing

I spent a few more hours at the Makerspace tonight trying to print more Tardis parts.  This time, I changed the Infill setting on the Makerbot Replicator to 0% and raised the temperature on the stepstruder to 235 degrees Celsius.  It seemed to complete the side panels more than it did the first time but they still are not 100% complete (see the picture below).  It did not fill on all the gaps.  Not sure why.

When I got to the space, someone was printing Star Trek badges.  However, the extruder was blocked and not printing anymore.  I took some time to print eight of the badges (see below).

Finally, I bought a BeagleBone Black the other day.  It arrived yesterday and I fired it up tonight.  Plugged the included USB cable into my laptop running Ubuntu Linux.  The computer found the board just fine.  However, I could not get Cloud9 to show me any of the code installed on the Black.

Someday, I hope to install this in my Home Environmental Sensor Array instead of the Raspberry Pi.