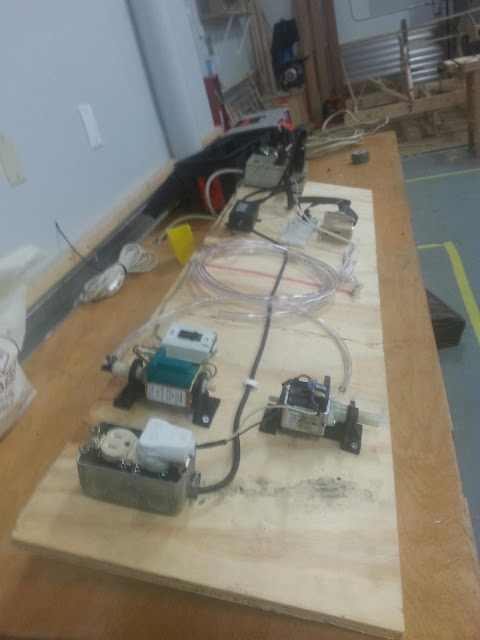
I decided to go to the Makerspace tonight and work on the test system for the Home Environmental Sensor Array. I got it mostly assembled. The only thing I still need is two containers for water. Then I need to cut the hoses for the water and see if it works. Here are some pictures of the nearly finished product.
The purpose of this blog is to record my progress on maker projects that I am working on. I will tag each post with the name of the project to group posts together.
Advertisement
Tuesday, June 25, 2013
Monday, June 24, 2013
Cables for water detector
Yesterday, I bought two power cords to use with the test system for the home environmental sensor array. The white power cord will be the sensor itself. One of the wires will send electricity from the pi and the other wire will receive the signal into the pi. The plug end will go in the crock. When water touches the leads, it will complete the circuit and send a signal to the raspberry pi.
The other cable is only for the test system. I will wire it to one of the water pumps I bought. That water pump will represent the sump pump. I can turn the switch off to simulate something going wrong with the sump pump.
I should be able to build the test system the next time I am at the Makerspace.
Saturday, June 22, 2013
Python Coding Mostly Done
- send an email to one or more email addresses including to, cc, and bcc
- the email addresses can be sent to the function in either a string or list variable and it will convert them to the correct formats for the header and for SMTP
- add the correct date to the header with UTC offset
- created a new function to determine the UTC offset in hours. So, the date and time in the email should be correct no matter what time zone the pi is in and regardless of daylight savings or not.
- added a debug boolean to add more text to the body of the email when testing the email module
Friday, June 21, 2013
More python coding
Saturday, June 15, 2013
Rocket launcher with Tim and Jacob
Thursday, June 13, 2013
Python Progress
Tuesday, June 11, 2013
The Power Switch Tail Works
Saturday, June 8, 2013
Power Switch Tail not working
I finished soldering the components onto my Power Switch Tail board last night. Plugged it in to the raspberry pi and the LED lit up. That works.
Then, I plugged it into an outlet. The relay is supposed to click. Nothing. Checked the output voltage with a multimeter. It was 3 volts or so. Something is stopping the electricity from getting through. Maybe I connected the relay incorrectly or I ruined it when soldering it on.
I need to spend some time troubleshooting.
Thursday, June 6, 2013
Started assembling the Power Switch Tail
Wednesday, June 5, 2013
Soldered a breakout box
This week, I bought some soldering tools and supplies for small electronics soldering. In the picture below you can see my new Weller soldering iron. I also got a roll of .022" solder. It's very small and works better with small parts. I purchased a small container of flux and a set of soldering tools. Finally, I bought a small pliers. I should be set for electronic projects now.
For my first project with my new soldering iron, I wired up my pi Cobbler board. See the picture below. First, I attached the ribbon connector to the board. Then, I soldered 13 pins on each side of the board so it can attach to my breadboard. Finally, I wired up a simple circuit to light a diode and connected the pi for power. It worked.
Next, I need to work on the power tail switch.


